Activity/Demo Title: Fluorescence
Activity overview:
The fluorescence demo and activity is designed to introduce the audience to light as electromagnetic radiation. To do this, we observe how non-visible, UV wavelengths are absorbed by fluorescent particles and then reemitted in visible wavelengths. We demonstrate this using a fluorescent painting as well as a set of naturally fluorescent minerals. The demo portion can be used in any booth-type setting with individual or group audience of any age and limited amount of time. The activity portion is best for small groups (K-6 age range) with more time – perhaps at UW Space Place or other similar setting.
Instructor Notes:
- Smaller groups are more desirable as this increases hands-on participation.
- It would be useful to ask guiding questions throughout the demonstration and have students guess what they think will happen before they take an action.
- Be sure to caution the participants against shining the UV light at anyone and remind them to only turn on the light when it is pointing at the painting or the rocks.
Materials needed:
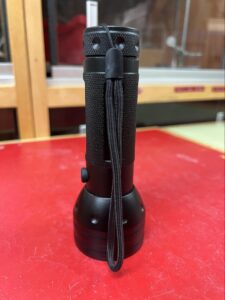
- A UV flashlight (Image 1)
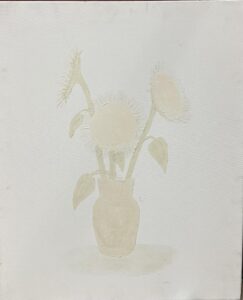
- A fluorescent painting (Image 2)
- A set of naturally fluorescent and non-fluorescent minerals
- A piece of string / rope around 2 feet long (only if doing the activity)
- Name-tag that says “UV light” (only if doing the activity)
- Name-tag that says “Fluorescent Particle” (only if doing the activity)
- Name-tag that says “Visible light” (only if doing the activity)
Steps to run the activity:
- Set up the painting to lean against a large object on the demo table. Have the rocks and minerals on the table next to the painting.
- Explain that light is electromagnetic radiation and is only one part of the electromagnetic spectrum. Possible explanation: Light is made of waves of energy that our eyes can convert to “images” that we can see. Ask for a volunteer to hold one end of the rope. Slowly move the rope to produce a wave. Explain that we can think of light as being made up of waves. But what do we know about waves? They can be shorter (speed up the waves to produce higher frequency) or longer (slow down the oscillations). The visible spectrum of light has a longer wavelength than other spectrum of light like ultraviolet (speed up the oscillations a bit). Tell them that this will be important later on.
- Ask if anyone has heard of fluorescence and if they want to explain what it is. After they explain, tell them that they are all going to do an activity together to find out what it is.
- Ask for 2 volunteers. Give them each a name tag (UV light, visible light). Keep the “fluorescent particle” name tag.
- Explain what fluorescence is and what is cool about it. Fluorescent particles absorb energy from higher-frequency wavelengths like UV light and then emit that energy at a lower-frequency wavelength in the visible range that humans can perceive.
- Now put on the “fluorescent particle” name-tag and explain that you will play the role of a fluorescent particle. Volunteer 1 will be the UV light and Volunteer 2 will be the visible light. Have them both spread out their arms and do a wave. Volunteer 1 (UV light) should be oscillating at a higher frequency than Volunteer 2 (visible light). Explain that when visible light (GENTLY) bumps into the fluorescent particle, nothing much happens. Demonstrate this. But when UV light (GENTLY) bumps into the fluorescent particle, the fluorescent particle gets excited and needs to release this energy (demonstrate by moving around). The fluorescent particle releases this energy in the form of visible light (demonstrate this by gesturing towards Volunteer 2 and then returning to a non-excited state).
- Now explain that we will get to see this actually happen. Ask for the name tags back.
- Show the UV flashlight and explain how it works. Emphasize that the UV flashlight should only point at the painting or rocks as it is dangerous to our eyes.
- Ask for 2 new volunteers and provide them with the name tags. Have the UV light volunteer shine the UV flashlight at the painting and then ask the audience what they notice. Ask Volunteer 2 what they think is happening and then explain for the audience.
- Then, ask them if they think this can happen in nature without fluorescent paint.
- Demonstrate that this does indeed happen in nature by shining the flashlight on the rocks.
Steps to run the demonstration:
- Set up the painting to lean against a large object on the demo table. Have the rocks and minerals on the table next to the painting.
- Explain that light is electromagnetic radiation and is only one part of the electromagnetic spectrum.
- Ask if anyone has heard of fluorescence and if they want to explain what it is.
- Explain what the UV flashlight is and how it works.
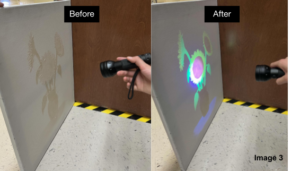
- Ask for a volunteer. Have them shine the UV flashlight at the painting and then ask the audience what they notice. See Image 3 for the demonstration.
- Ask them what they think is happening. Explain what is happening.
- Then ask for a different volunteer to pick several minerals. Shine the flashlight at the different minerals to see what happens.
Suggestions for future demos:
- Include the differences between fluorescence and phosphorescence.
- Perhaps include glow-in-the-dark stars to illustrate how phosphorescence is different from fluorescence.
- Perhaps also time how long it takes for the star’s glow to fade vs. the painting


